
安装:
npm install -g json-server创建一个db.json 文件
整个文件相当于一个数据库,每一个属性相当于一个表是一个数组,它里面的每个对象代表一条数据,*切记里面的每个对象都要有id,不写他就会自动生成*
{
  "posts": [
    { "id": 1, "title": "json-server", "author": "typicode" }
  ],
  "comments": [
    { "id": 1, "body": "some comment", "postId": 1 }
  ],
  "profile": { "name": "typicode" }
}
启动:
json-server --watch db.json
//更换端口号
json-server --watch db.json --port 3004
json文件中每一个一级属性就相当于一个表,他是一个数组,数组里的每一条数据就相当于表里的每一条数据,表名后面要加s(例如posts,comments),不然关联的时候不起作用,以后跟这个表向关联的的时候只需要写表名Id即可 如下面的deleete
取数据:get请求用于取数据,一般获取到的数据是一个数组
axios.get('http://localhost:8000/posts')查询id=1
http://localhost:8000/posts?id=1
http://localhost:8000/posts/1
查询id=1并且title=2的
插入数据:post
localhost/posts posts代表往posts数组中插入一条数据,id会自动生成,参数就是要插入的值
axios.post('http://localhost:8000/posts',{"title": "3", "author": "1231232131"})修改:put (会将原来的对象直接覆盖)用法和patch一样只是作用不一样
修改:patch (只会修改要修改的东西,没有该属性就会增加)
localhost/posts/2 2代表的是要修改id为2的那条数据 后面是要修改的属性值
axios.patch('http://localhost:8000/posts/2',{"title": "2222"})删除 :delete 他会把性关联的数据也会删除
axios.delete('http://localhost:8000/posts/7')
// 别的表里的"postId": 7这条数据也会删除
    {
      "id": 1,
      "body": "some comment",
      "postId": 7
    }
表的关联查询 _embed
posts代表要查这个表 _embed=comments表示还要查comments这个表里跟posts表相关联的东西
axios.get('http://localhost:8000/posts?_embed=comments')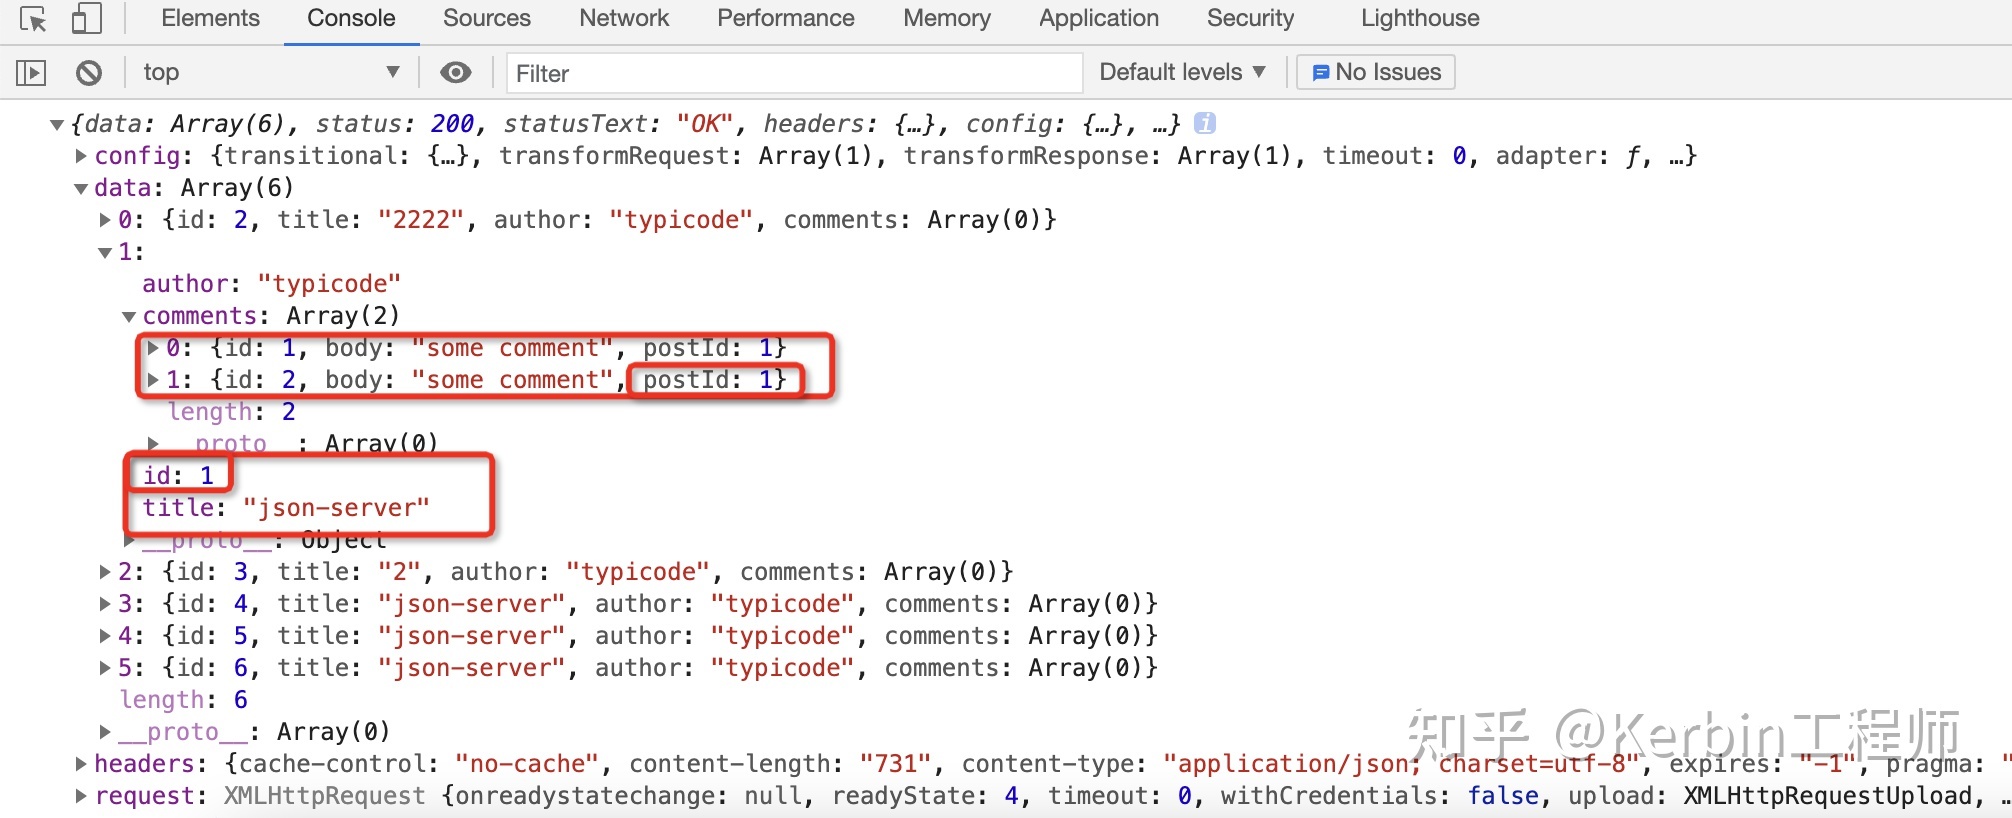
_expand 与_embed相反,例如他会查出一篇文章是谁发布的并查出那个人的信息
axios.get('http://localhost:8000/comments?_expand=post')
//查出comments下id为1的那一条数据只需要下面的链接
http://localhost:8000/comments/1?_expand=post