# 原因
我们经常使用 GitHub、GitLab、Gitee 之类的仓库,有时候需要频繁的发布代码打包,人工发布,工作量有时候会很大,有时候还容易出错,所以会使用 Jenkins 一类的工具进行辅助,但是如果是一个简单的项目或者是个人项目使用 Jenkins 就显得太重了,可以直接使用 webhook,比较方便。
# 什么是 webhook
准确的说 webhoo 是一种 web 回调或者 http 的 push API,是向 APP 或者其他应用提供实时信息的一种方式。Webhook 在数据产生时立即发送数据,也就是你能实时收到数据。这一种不同于典型的 API,需要用了实时性需要足够快的轮询。这无论是对生产还是对消费者都是高效的,唯一的缺点是初始建立困难。
Webhook 有时也被称为反向 API,因为他提供了 API 规则,你需要设计要使用的 API。Webhook 将向你的应用发起 http 请求,典型的是 post 请求,应用程序由请求驱动。
# 配置 webhook
知道什么是 webhook 后我们就要开始配置我们自己的项目了。
环境:
CentOS7
Gitee(网上 GitHub 的教程比较多,这个基于码云)
- 配置项目公私钥
- 生产公钥
ssh-keygen -t rsa -C "xxxxx@xxxxx.com" | |
# Generating public/private rsa key pair... | |
# 三次回车即可生成 ssh key |
- 查看公钥
cat ~/.ssh/id_rsa.pub | |
# ssh-rsa AAAAB3NzaC1yc2EAAAADAQABAAABAQC6eNtGpNGwstc.... |
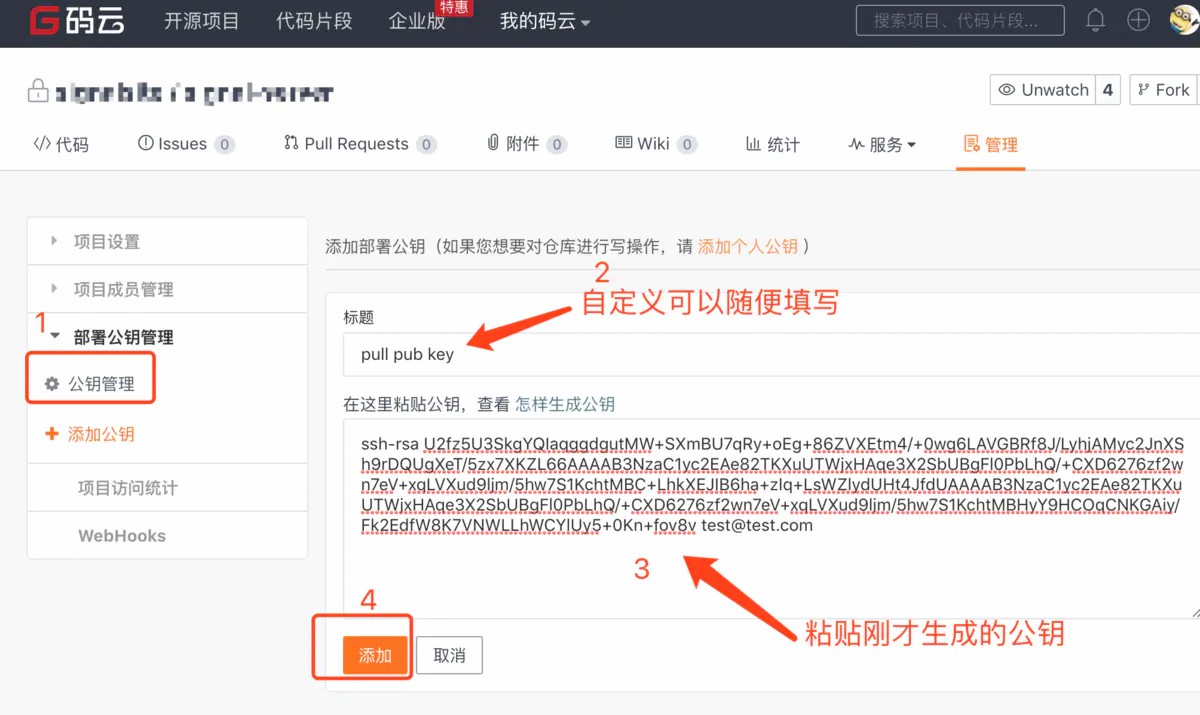
- 添加公钥
- 测试
ssh -T git@gitee.com | |
Welcome to Gitee.com, yourname! # 返回,说明正常 |
- 配置服务器 node 环境
- 安装 nvm,服务器上使用 nvm 方便多版本 node 切换
curl -o- https://raw.githubusercontent.com/creationix/nvm/v0.33.8/install.sh | bash | |
vim /etc/profile | |
#加入下面的内容 | |
export NVM_DIR="$HOME/.nvm" | |
[ -s "$NVM_DIR/nvm.sh" ] && \. "$NVM_DIR/nvm.sh" | |
source /etc/profile | |
nvm install stable # 安装稳定版 | |
nvm current # 查看当前的版本 |
- 配置相关的脚本
安装 gitee-webhook-handler (GitHub,GitLab,gitee 的包是不同的,不能混用)
mkdir /opt/webhook #创建目录 | |
cd /opt/webhook | |
npm init # 初始化项目,方便以后迁移 | |
npm install gitee-webhook-handler --save # 当前的版本为 v0.1.2 |
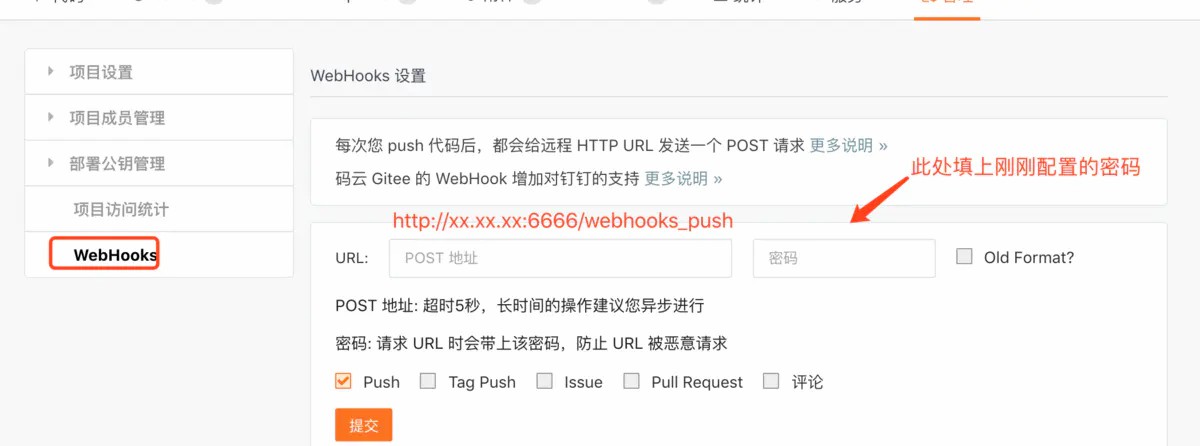
- 创建对应的 webhook 服务
vim webhook.js | |
var http = require('http') | |
var createHandler = require('gitee-webhook-handler') | |
var handler = createHandler({ path: '/webhooks_push', secret: '123456' });// post 所需要用到的秘钥 | |
function run_cmd(cmd, args, callback) { | |
var spawn = require('child_process').spawn; | |
var child = spawn(cmd, args); | |
var resp = ""; | |
child.stdout.on('data', function(buffer) { resp += buffer.toString(); }); | |
child.stdout.on('end', function() { callback (resp) }); | |
} | |
handler.on('error', function (err) { | |
console.error('Error:', err.message) | |
}) | |
handler.on('Push Hook', function (event) { // 这个地方就是GitHub 和 Gitee 不一样的地方,需要注意 | |
console.log('Received a push event for %s to %s', | |
event.payload.repository.name, | |
event.payload.ref); | |
run_cmd('sh', ['./deploy.sh'], function(text){ console.log(text) });// 需要执行的脚本位置 | |
}) | |
try { | |
http.createServer(function (req, res) { | |
handler(req, res, function (err) { | |
res.statusCode = 404 | |
res.end('no such location') | |
}) | |
}).listen(6666) // 服务监听的端口,可以自行修改 | |
}catch(err){ | |
console.error('Error:', err.message) | |
} |
- 创建需要执行的脚本
vim deploy.sh | |
git pull xxxxx // 根据自己的需要自行编写 |
- 测试服务
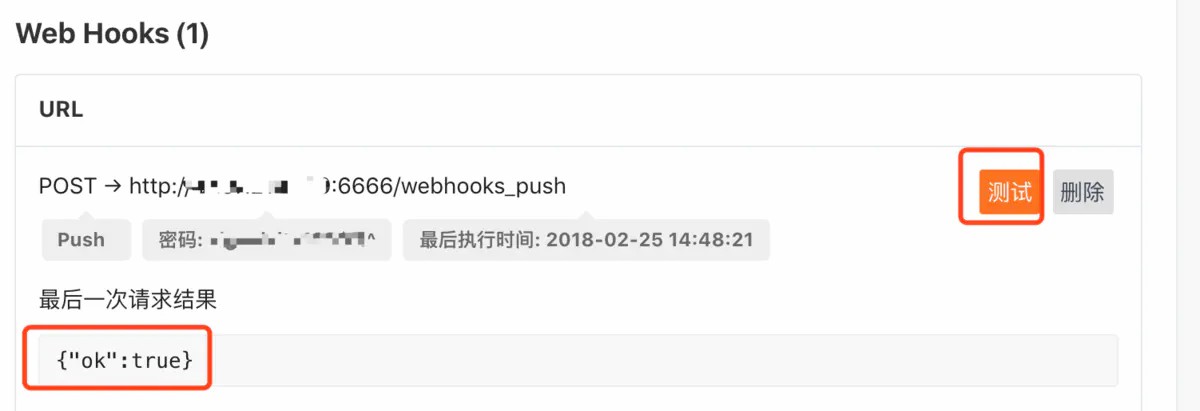
显示 ok,说明成功
# 使用 pm2 应用进程管理器
使用 node 启动服务不是很方便,推荐使用 pm2
npm install -g pm2 | |
pm2 start webhook.js | |
pm2 monit # 可以通过此命令查看服务的状态 |
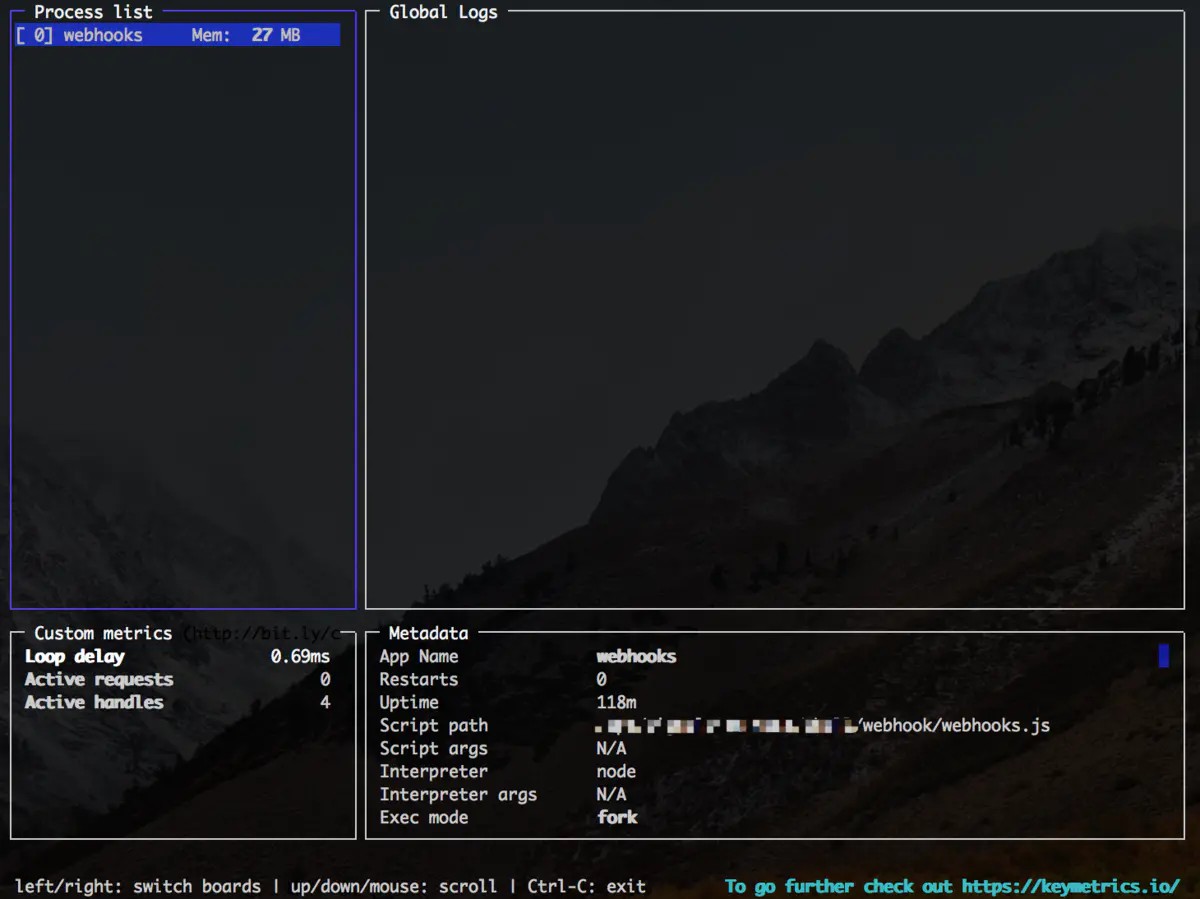
上图显示了一些应用的基本信息,可以更好的观察到服务的状态
# 结束
配置完成后,只要 pull 代码到仓库,就会触发 webhook 执行脚本,十分的方便,同时减少了工作量,相对采用轮询的方式消耗的资源更小。