# 1、为什么使用 Plop?
一般项目开发过程中,我们都要编写 (CV) 一大堆重复性的代码,比如一个 views/login/index.vue,比如 store/modules/app.js,这些文件都是重复毫无意义的,找一个自动生成的工具就可以了。
# 2、Plop 是什么?
Plop 主要用于创建项目中特定文件类型的小工具,类似于 Yeoman 中的 sub generator,一般不会独立使用。一般会把 Plop 集成到项目中,用来自动化的创建同类型的项目文件。
Plop 插件地址:https://www.npmjs.com/package/plop
# 3、Plop 配置
基于 Plop 创建 Vue component、store、view 文件模板。
# 3.1、定义配置文件
项目根目录下新建 plopfile.js 文件,定义 Plop 自动生成的内容及对应的模板。
这里定义了 view、component、store 三个内容。
const viewGenerator = require('./plop-templates/view/prompt') | |
const componentGenerator = require('./plop-templates/component/prompt') | |
const storeGenerator = require('./plop-templates/store/prompt.js') | |
module.exports = function(plop) { | |
plop.setGenerator('view', viewGenerator) | |
plop.setGenerator('component', componentGenerator) | |
plop.setGenerator('store', storeGenerator) | |
} |
# 3.2、定义模板文件
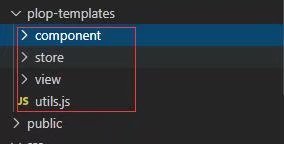
项目根目录下新建 plop-templates 文件夹,并下载 plop-template 文件包。
下载地址:https://gitee.com/lixianglong3210/fast-vue/tree/master/plop-templates
放到项目根目录,文件内容如下图:

component 模板文件包括 .hbs 和 .js 两个文件。

index.hbs 模板文件
<!--swig0--> | |
<template> | |
<div /> | |
</template> | |
<!--swig1--> | |
<!--swig2--> | |
<script> | |
export default { ...} | |
</script> | |
<!--swig3--> | |
<!--swig4--> | |
<style lang="scss" scoped> | |
</style> | |
<!--swig5--> |
prompt.js 文件
const { notEmpty } = require('../utils.js') | |
module.exports = { | |
description: [ | |
'generate vue component', | |
... | |
], | |
actions: data => { ... } | |
return actions | |
} |
# 3.3、定义启动脚本
在 package.json 中新增
"script":{ ..., "new": "plop",} |
# 4、创建模板文件
控制台直接输入如下命令,根据提示创建模板文件。
npm run new |

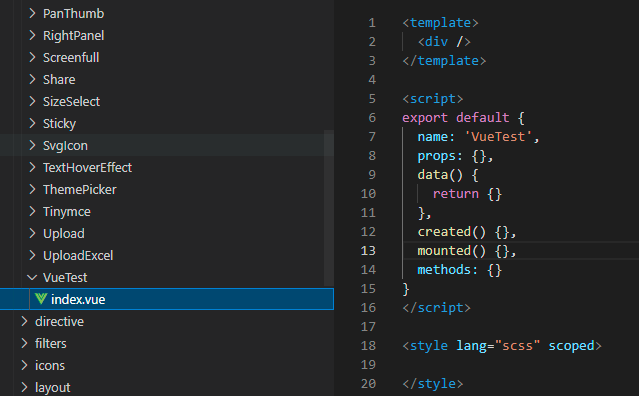
生成后的文件如下:
