转自:https://zhuanlan.zhihu.com/p/163032982
Object Oriented Programming (OOP) 面向对象衍生出的精华之一 —— 设计模式,在过去几十年的软件开发历史中被证明是行之有效的一系列软件设计最佳实践。
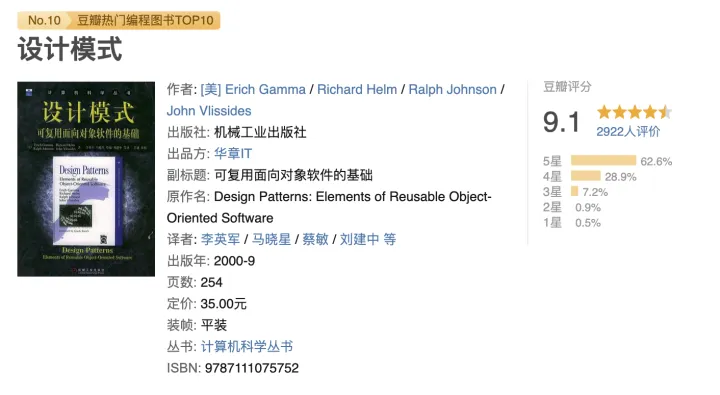
这本《设计模式:可复用面向对象软件的基础》是讲述设计模式的经典书籍,懂 Java 的朋友务必要看看这本书。
如果是纯前端的同学,Java 语法看起来可能有点不习惯。但事实上,或许也不一定要看懂这本书的代码,而是去理解里面描述的设计模式到底是什么。
在上一篇文章
我的观点是在大部分场景下不鼓励使用 JavaScript class 。
不使用 class 的情况下,JavaScript 开发中还能使用设计模式吗?—— 毕竟这是几十年来许许多多程序员先驱们总结出来的 精髓!
答案是 —— 当然可以!只不过是用 JavaScript 原生的方式(functional way)来实现。
# 单例模式
单例模式的目标是在整个程序中,某个类有且只有一个实例。
# 方案一:
const Singleton = (function () { | |
let instance; // 闭包形成私有变量 | |
function createInstance() { | |
console.log("call createInstance"); | |
const object = new Object("I am the instance"); // 可以替换成更复杂的对象构建过程 | |
return object; | |
} | |
return { | |
getInstance: function () { | |
if (!instance) { // 惰性创建实例 | |
instance = createInstance(); | |
} | |
return instance; | |
} | |
}; | |
})(); // 自执行函数 | |
const instance1 = Singleton.getInstance(); | |
const instance2 = Singleton.getInstance(); | |
console.log("Same instance? " + (instance1 === instance2)); // 输出 true |
这个方案基本照搬了 Java 单例模式的实现,唯一的区别是没有用 class 而是 函数和闭包。
# 方案二:
ES6 module 的静态 import 中有以下规范
https://tc39.es/ecma262/#sec-hostresolveimportedmodule
Each time this operation is called with a specificreferencingScriptOrModule,specifierpair as arguments it must return the sameModule Recordinstance if it completes normally
即在一次程序运行中,一个 module 只会被初始化一次,无论被 import 几次, 拿到的都是同一个 module 实例。
这不就是我们想要的单例行为吗?代码也就很好写了
// Singleton.js | |
console.log("initialize singletonInstance module"); | |
let counter = 0; | |
export const singletonInstance = { | |
increase: () => { | |
counter++; | |
}, | |
getCounter: () => { | |
return counter; | |
} | |
} | |
export default singletonInstance; |
测试一下效果 —— 编写几个内容相同的 js 文件,分别命名为 SingletonUser1.js 、SingletonUser2.js 、SingletonUser3.js
import singletonInstance from "./Singleton.js" | |
singletonInstance.increase(); | |
export default {} |
然后编写一个测试文件 index.js
import SingletonUser1 from './SingletonUser1.js'; | |
import SingletonUser2 from './SingletonUser2.js'; | |
import SingletonUser3 from './SingletonUser3.js'; | |
import singletonInstance from "./Singleton.js" | |
console.log("counter value: " + singletonInstance.getCounter()); | |
singletonInstance.increase(); | |
console.log("counter value: " + singletonInstance.getCounter()); |
运行会得到以下结果
initialize singletonInstance module | |
counter value: 3 | |
counter value: 4 |
结果分析:
Singleton.mjs 就算被 import 了 4 次,也只会初始化一次
每个 SingletonUser 都会调用一次 increase 方法,所以第一次输出的 counter 值是 3;
index.js 又执行了一次 increase 方法,counter 值最后变成了 4 —— 可见它们是调用同一个 singletonInstance 实例
(这个方案的坑:目前确定静态 import 只会对被 import 的目标 module 初始化一次。但是动态 import 和 异步 import 就可能有其他情况,我目前还没有找到比较可靠的资料。)
上面的两个单例方案都是纯 JavaScript 实现,现实开发中,如果对是否真的单例创建有疑虑,可以配合外部环境进一步加强(例:在 sessionStorage 里存放初始化标志位)
# 装饰者模式
装饰者模式用于 动态的给目标添加一些额外的属性或行为 —— 在 JavaScript 里,目标既可以是对象,也可以是 function,甚至可以是 Promise。
(p.s. 下文提到的装饰者都是被装饰、增强后的目标)
本文举个 function 的例子:
function takeNormalPicture(landscape) { // 拍一张普通照片 | |
console.log("take a picture of the landsacpe - " + landscape); | |
return { | |
name: landscape | |
} | |
} | |
const picture1 = takeNormalPicture("The Great Wall"); | |
console.log(JSON.stringify(picture1, null, 4)); | |
function meituEnhance(takePicture){ // 增强函数 | |
return (landscape)=> { // 返回一个装饰者 | |
const res = takePicture(landscape); | |
console.log("enhance the picture with meitu"); // 可以美化图片 | |
res.quality = 'high'; // 给图片添加额外属性 | |
return res; | |
} | |
} | |
// 增强后的相机,即装饰者 | |
const takeBetterPicture = meituEnhance(takeNormalPicture); | |
// 装饰者的使用 跟原本的函数没有区别 | |
const picture2 = takeBetterPicture("The Great Wall"); | |
console.log(JSON.stringify(picture2, null, 4)); |
输出的结果
take a picture of the landsacpe - The Great Wall | |
{ | |
"name": "The Great Wall" | |
} | |
take a picture of the landsacpe - The Great Wall | |
enhance the picture with meitu | |
{ | |
"name": "The Great Wall", | |
"quality": "high" | |
} |
看完代码,读者会发现 —— meituEnhance 不是个高阶函数吗?
是的,没错。在 JavaScript 中函数是一等公民,因此函数可以作为参数也可以作为返回结果,meituEnhance 就是一个以函数为参数,以另一个函数为结果的高阶函数。
装饰者模式的精髓在于
- 动态地给目标添加一些额外的属性或行为 —— 装饰者模式可以对原目标(以 function 为例)的参数、过程、结果进行增强、修改、删除。
- 同时,调用者无感知 —— 装饰者的 API 跟原目标的 API 一模一样。
如何对 Promise 使用 装饰者模式,可以参考我之前的一篇文章
【JS 进阶】Javascript 闭包与 Promise 的碰撞
# 代理模式
代理模式跟装饰者模式实现上有几分相像,但是目的有些差异 —— 给目标(对象、function)创建一个代理,而代理内部通常有额外的逻辑(与原目标无关的逻辑)
上代码:
function loadGifImage(path) { // 加载 gif 图片 | |
console.log("loading GIF image from path : " + path); | |
return { | |
path: path, | |
image: 'mock-image' | |
} | |
} | |
function loadOtherImage(path) { // 加载 其他 图片 | |
console.log("loading normal image from path : " + path); | |
return { | |
path: path, | |
image: 'mock-image' | |
} | |
} | |
function imageProxy() { | |
const map = {}; // 闭包特性 | |
return function (path) { // 图片加载代理 | |
if (path in map) { // 新增了缓存功能 | |
console.log("No need to load from fs for : " + path); | |
return map[path]; | |
} | |
// 根据图片的格式,使用不同的方式加载图片 | |
const image = path.endsWith('gif') ? loadGifImage(path) : loadOtherImage(path); | |
map[path] = image; | |
return image; | |
} | |
} | |
const proxy = imageProxy(); // 代理 | |
proxy('img1.gif'); | |
proxy('img2.jpg'); | |
proxy('img3.png'); | |
proxy('img1.gif'); | |
proxy('img2.jpg'); | |
proxy('img4.gif'); |
输出结果
loading GIF image from path : img1.gif //-> 加载 GIF | |
loading normal image from path : img2.jpg //-> 加载普通图片 | |
loading normal image from path : img3.png | |
No need to load from fs for : img1.gif //-> 缓存了 | |
No need to load from fs for : img2.jpg //-> 缓存了 | |
loading GIF image from path : img4.gif |
实现上,imageProxy 也是个高阶函数,同时内部用到了闭包的特性,放置了一个缓存 map。
同 装饰者模式一样,代理的 API 也尽量与原目标保持一致,让外部调用者无感知。
代理模式引入的额外逻辑通常有 3 类:
- 对外部调用者隐藏真实的执行者(如:上面的调用者可能根本不知道有 loadGifImage 这个函数)
- 优化执行过程 (如:上面加入了缓存,不必每次都去加载图片)
- 增加了额外的 " 内务工作”(house-keeping) ( 如:上面的图片缓存过多时,可能要释放掉一部分;清理过期资源等)
# 适配器模式
适配器模式通常用来适配新、老接口,让它们能和谐工作 —— 这里的接口不必是 OOP 中的接口,你可以理解为广义的接口 即 暴露给外部调用的 API 协议。
让我们看看鼎鼎大名的 JavaScript http 客户端库 axios 的源代码里如何使用 适配器模式的。
axios 即可以在前端开发中使用,也可以在 Node 环境下使用 —— 它是怎么做到的呢?
//adapter/http.js 给 Node 环境使用的适配器 | |
module.exports = function httpAdapter(config) { | |
return new Promise(function dispatchHttpRequest(resolve, reject) { | |
// ... | |
}); | |
} | |
//adapter/xhr.js 给 浏览器环境使用的适配器 | |
module.exports = function xhrAdapter(config) { | |
return new Promise(function dispatchXhrRequest(resolve, reject) { | |
// ... | |
}); | |
} | |
// default.js | |
function getDefaultAdapter() { | |
var adapter; // 判断环境,选择合适的适配器 | |
if (typeof XMLHttpRequest !== 'undefined') { | |
// For browsers use XHR adapter | |
adapter = require('./adapters/xhr'); | |
} else if (typeof process !== 'undefined') { | |
// For node use HTTP adapter | |
adapter = require('./adapters/http'); | |
} | |
return adapter; | |
} | |
//axios.js 直接使用适配器开始工作 | |
adapter(config).then(function onAdapterResolution(response) { | |
// ... | |
}); |
源码: https://github.com/axios/axios/tree/master/lib/adapters
适配器的核心在于
- 定义一个统一的接口;
- 写一层额外的代码调用、封装下层的 API ,让这层代码暴露出定义好的接口。
axios 源码中,写了两段代码分别调用且封装了 Node 下的 http.js 和 浏览器下的 XMLHttpRequest,这两段代码就是适配器,它们暴露出来的接口是一样的 —— 接收一个 config 对象,返回一个 Promise
# 命令模式
命令模式 —— 把命令(请求、操作)封装成对象发送给执行端执行。
// 1. 基础属性,只保留基本属性,一般不在此对象上做封装 | |
const light = { | |
turnOn: () => console.log("turn on the light"), | |
turnOff: () => console.log("turn off the light") | |
} | |
// 2. 可扩展属性,单独针对某个行为,并可以扩展此行为的丰富性 | |
const switchOnCommand = { // 开灯指令 | |
name: 'switchOnCommand', | |
execute: () => light.turnOn | |
// 可扩展属性 | |
} | |
const switchOffCommand = { // 关灯指令 | |
name: 'switchOffCommand', | |
execute: () => light.turnOff | |
} | |
// 3. 命令某个行为的产生 | |
function lightSwitchFactory() { // 工厂函数 | |
let lastCommand = null // 存放上一个指令 | |
const receiveCommand = command => { // 接收指令 | |
lastCommand = command | |
command.execute() // 执行指令 | |
} | |
return { | |
receiveCommand, | |
undo: () => { // 提供撤销功能 | |
if(!lastCommand) return | |
console.log("undo the last command") | |
lastCommand.name === 'switchOnCommand' ? receiveCommand(switchOffCommand) : receiveCommand(switchOnCommand) | |
} | |
} | |
} | |
const lightSwitch = lightSwitchFactory() | |
lightSwitch.receiveCommand(SwitchOnCommand) | |
lightSwitch.receiveCommand(SwitchOffCommand) | |
lightSwitch.undo() |
输出结果
turn on the light | |
turn off the light | |
undo the last command // 撤销上一次操作,上次是关灯,所以现在开灯 | |
turn on the light |
命令模式的精髓在于
- 把执行命令从一个动词变成名词 即 封装成对象,方便传递;
- 可以在命令对象里添加更多属性(如上面代码中的 name ),可以作为标志或其他功能;
- 命令可以被存储起来,方便实现撤销、重做等功能
其实 Redux 的 action 机制也有点像 命令模式,不过 redux 更进一步,把命令的执行函数拆分到了 actionCreator 、reducer 和 middleware 里。
# 责任链模式
责任链模式为请求创建一条接收者链,每当有请求发出,这条链上的接收者依次检查是否该由自己处理,如果是就(拦截)处理,否则就继续传递给下一个接收者。
const LOGGER_LEVELS = { | |
INFO: 0, | |
DEBUG: 1, | |
WARNING: 2, | |
ERROR: 3 | |
} | |
function createLogger(level, logFunc) { // 工厂函数 | |
return { | |
accept: (paraLevel) => paraLevel >= level, // 只有在消息等级不低于 level 时,这个 logger 才会执行 | |
log: logFunc | |
} | |
} | |
const emailLogger = createLogger(LOGGER_LEVELS.ERROR, message => console.log('send the log to admin email : ' + message)) | |
const fileLogger = createLogger(LOGGER_LEVELS.WARNING, message => console.log('send the log to file : ' + message)) | |
const testLogger = createLogger(LOGGER_LEVELS.DEBUG, message => console.log('send the log to test : ' + message)) | |
const consoleLogger = createLogger(LOGGER_LEVELS.INFO, message => console.log('send the log to console : ' + message)) | |
// 构建一个责任链 | |
const loggers = [emailLogger, fileLogger, testLogger, consoleLogger] | |
// 外部调用接口 | |
function log(messageObj) { | |
loggers.forEach(logger => { // 接收者依次过目请求 | |
if (logger.accept(messageObj.level)) { | |
logger.log(messageObj.message) // 这个场景中,请求不会被拦截,而是继续让后面的接收者处理 | |
} | |
}) | |
} | |
log({level: LOGGER_LEVELS.INFO, message: "an info message"}) | |
log({level: LOGGER_LEVELS.DEBUG, message: "a debug message"}) | |
log({level: LOGGER_LEVELS.WARNING, message: "a warning message"}) | |
log({level: LOGGER_LEVELS.ERROR, message: "an error message"}) |
输出结果
send the log to console : an info message | |
send the log to test : a debug message | |
send the log to console : a debug message | |
send the log to file : a warning message | |
send the log to test : a warning message | |
send the log to console : a warning message | |
send the log to admin email : an error message | |
send the log to file : an error message | |
send the log to test : an error message | |
send the log to console : an error message |
责任链模式的精髓 —— 提供了简洁的代码结构,省却了大量的 if else (想象一下如果不使用责任链模式实现上面的需求,代码会变成什么样)
注意事项:
- 拦截请求是可选的,即一个接收者处理结束之后是否需要让后续的接收者继续处理;
- 如果决定拦截请求,就要格外小心责任链的顺序。
今天先介绍这几个 设计模式 在 JavaScript 中的 functional 实现方式。
除了让读者们了解、学习设计模式,我更想表达的是 ——
原来不用 class ,我们也可以在 JavaScript 中实现设计模式!
原来不用 class ,我们也可以在 JavaScript 借鉴前人的最佳实践和思想 !
原来不用 class ,我们写 JavaScript 也可以很开心!
作为一等公民,function 在 JavaScript 可以做很多事情,而且做起来更容易更顺畅。
跟 function 紧密相关的 高阶函数 和 闭包特性,带来了很多便利(如 代理模式,适配器模式);另外 有个设计模式叫 策略模式,我这边完全没介绍的原因是 —— 在 JavaScript 中实现它太容易了,因为 function 本身就是可以被当做参数传递的。
JavaScript 的 ES6 module 也让单例模式变得前所未有的简单。
上面的示例代码中,也用到了不少 function factory(工厂函数) 来创建对象,不需要 new 一样自然、流畅。
总之,在 JavaScript 中即使不使用 class、prototype,很多逻辑代码也一样可以实现,甚至更简单自然。在我个人的开发实践中,function 是首选方案,而 class 从来都是备选方案 —— 只有当业务场景非常非常适合 class 时,我才会使用。
英语有句谚语
when in Rome do as the romans do
中文也有
入乡随俗
既然 JavaScript 是一个偏 functional programming 的 编程语言,我们就应该学好 JavaScript 的 function 和相关特性 以便可以更 functional 地写出 js 代码 ;此外很多优秀的 JavaScript 库也采用了 functional 的写法 ( 比如 axios 、redux 等),如果不能很好地理解 function、闭包等知识,看这些源码的时候就会很吃力。
(p.s. 本文提到的 functional programming 并不是严格意义上的 functional programming,只是一个比较宽泛的定义,希望个别读者勿杠)
参考链接:
https://developer.mozilla.org/en-US/docs/Web/JavaScript/Reference/Functions
https://tc39.es/ecma262/#sec-hostresolveimportedmodule
https://en.wikipedia.org/wiki/Software_design_pattern
https://github.com/axios/axios